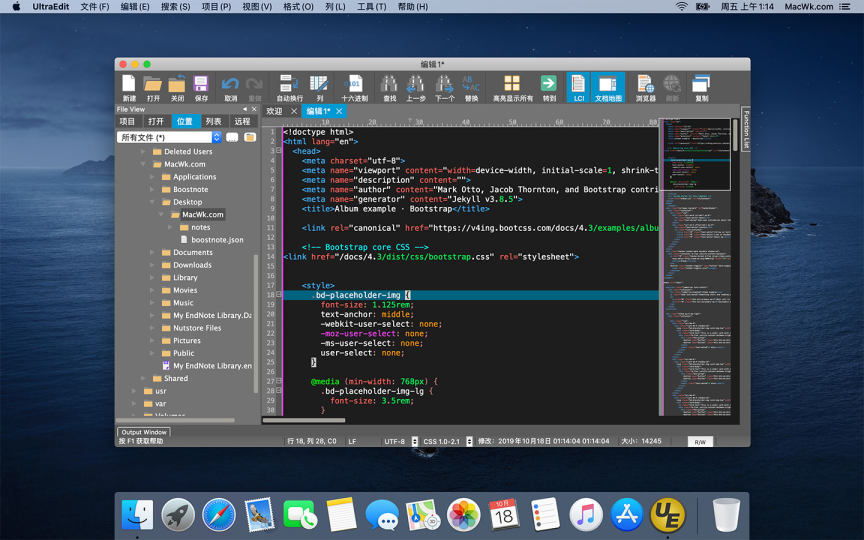
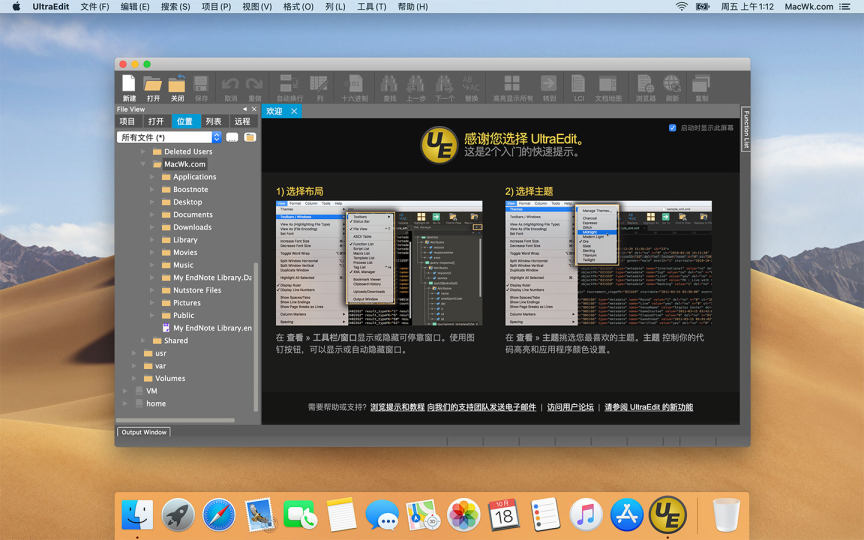
UltraEdit 20 for Mac is a powerful text code editor。UltraEdit can edit text、hexadecimal text、ASCII code,Can edit multiple files at the same time,File comparison is possible,UltraEdit built-in FTP browser,and supports syntax highlighting for hundreds of programming languages,With integrated SSH / telnet client,Script,Custom tools,Macros and smart templates,UltraEdit can be used with any coding session。This site provides UltraEdit20 mac crack version download。
statement:All articles on this site,If there is no special instructions or markings,All are originally published by this site。any person or organization,Without the consent of this website,Reproduction prohibited、Misappropriate、collection、Publish content from this site to any website、Books and other media platforms。If the content on this site infringes upon the legitimate rights and interests of the original author,You can contact us for processing。
Can free downloads or VIP membership resources be used directly for commercial use?
The copyright of all resources on this site belongs to the original author,The resources provided here are for reference and study purposes only.,Please do not use it directly for commercial use。If copyright disputes arise due to commercial use,All responsibility lies with the user。For more instructions, please refer to VIP introduction。
It prompts that the download is complete but cannot be decompressed or opened?
The most common situation is an incomplete download: You can compare the capacity of the downloaded compressed package with the capacity on the network disk,If it is less than the capacity prompted by the network disk, this is the reason。This is a browser download bug,It is recommended to download using Baidu Netdisk software or Thunder。 If this situation is excluded,You can leave a message at the bottom of the corresponding resource,or contact us。
Can't find the sample image in the material resource introduction article?
For members only、Whole site source code、Program plug-in、website template、Web page templates and other types of materials,The pictures used for introduction in the article are usually not included in the corresponding downloadable material package.。These related commercial images need to be purchased separately,And this site is not responsible for(There is no way)find source。 The same is true for some font files,However, some materials will have a list of font download links in the material package.。
The download address cannot be displayed or the content cannot be viewed after payment?
If you have successfully paid but the website does not pop up a success prompt,Please contact the webmaster to provide payment information for you to process
After purchasing this resource,Can I get a refund?
Source code materials are virtual goods,replicable,Transmissibility,once granted,No refunds of any kind will be accepted、Exchange request。Please confirm before purchasing to obtain the resources you need.
Comments (0)
Note: Please be respectful and civil in your comments Cancel reply
EasyDataTransform is a powerful Excel and CSV file conversion tool,Allows you to quickly convert table and list data into new,more useful form。 compared to other methods,EasyDataTransform's visual transformation is faster,More interactive,More repeatable and less error-prone。And very fast,Able to process approximately 100,000 rows of data in seconds。It’s also very simple to use,Just drag and drop files into the file area,Just add a conversion。 No coding required,Merge easily、Split、clean up、Deduplication、Reformatting, etc.,Get your data in the form you need in just a few clicks!
The slide layout in every Keynote theme is based on the master slide。When you need to add a specific element such as a title、subtitle、when you slide a bulleted list or image),You can select the master slide that best meets your needs for modification.。so,Slides in the presentation will be changed,while the master slide will retain its original state。 Add a master slide 1. Click "Display" in the toolbar,Then select "Edit Master Slide"。 2.Do any of the following: •Click the Add button in the toolbar,Select a master slide。 •In the slide navigator,Choose a slide that is similar to the layout you want,Then press Return。 3.Double-click the name of the master slide in the slide navigator,Enter a new name。 4.Add text as needed、image、shape、placeholder or other object,and make modifications。If you want objects in a slide based on this master to be overlaid on the master object,Select "Allow layering" in the Format sidebar。 5.After finishing editing,Click Done at the bottom of the slide canvas or Show in the toolbar,Then select "Exit Master Slideshow"。 Add text、Image and shape placeholders 1. Click View in the toolbar,Then select "Edit Master Slide"。 2.Select the master slide to edit。 3.Change the text box、image、Add videos or shapes to slides,and change its appearance as needed,Then drag it to the appropriate location。 4.Select the object to add,Then in the "Format" sidebar,Select Define as text placeholder (for a text box or shape) or Define as media placeholder (for an image or video)。 5.If you want objects in a slide based on this master to be overlaid on the master object,Please select "Allow layering"。 6.After finishing editing,Click Done at the bottom of the slide canvas or Show in the toolbar,Then select "Exit Master Slideshow"。 Add object placeholders to tables and charts 1. Placeholders for tables or charts are called object placeholders。There can only be one object placeholder per master slide。 2.Click Show in the toolbar,Then select "Edit Master Slide"。 3.Select the master slide to edit。 4.In the Format sidebar,Select the Object Placeholder checkbox。 5.Resize and place the placeholder where you want it。on any slide based on this master,Tables and charts added to this slide will be of this size and position。 6.If you want objects in a slide based on this master to be overlaid on the master object,Please select the "Allow layering" checkbox。 7.After finishing editing,Click Done at the bottom of the slide canvas or Show in the toolbar,Then select "Exit Master Slideshow"。 Go through the above steps,You can easily add and edit master slides in Keynote,Make your presentations more professional and beautiful。Hope this tutorial is helpful!
Mac computers are our commonly used Internet tools,Sometimes we need to take a break but don’t want to interrupt our current work,So how to lock the screen quickly? Here’s how to quickly lock the screen on your Mac computer,Hope it helps everyone。 Setup steps: 1. Open System Preferences •Click on the Apple icon in the upper left corner of the desktop,Select "System Preferences" from the drop-down menu。 2. Go to Security & Privacy • In the System Preferences screen,Click "Security & Privacy"。 3.Unlock Settings •Click the “General” tab above,Then click the lock icon at the bottom left of the interface。 •Enter the password in the pop-up dialog box and select "Unlock"。 4. Set a password requirement • Select "Require password now" in the "Enter sleep or start screen saver" section,Close the page when finished。 5. Set a screen saver •Return to System Preferences,Click on "Desktop & Screensavers"。 •Select the "Screensaver" tab above,Then click "Trigger Corner" at the bottom right of the interface。 6. Set the trigger angle •In the pop-up trigger angle setting interface,Select a corner as the corner to trigger the screensaver,After the settings are completed, click "OK" on the lower right。 •Now,Move the mouse to the corner you just set to complete the quick lock screen。
Computers are almost indispensable in our daily lives,And network connection is an important part of daily work and entertainment。For users using Windows systems,The disconnect may simply disable local connections。But for novices who have just come into contact with Mac,how to get it right、Easily disconnecting your Mac from the Internet may still be a mystery。don’t worry,Here are some simple and practical methods for disconnecting Mac computers from the Internet.,Allows you to easily disconnect from the network。 Method one:Use the network settings that come with the Mac system. Click the Apple icon in the upper left corner of the screen.,Select "System Preferences"。 in the pop-up window,Click "Network"。 In the list of network connections on the left,Select the network connection you want to disconnect (such as Wi-Fi or Ethernet)。 Click the "Advanced" button in the lower right corner。 in the pop-up window,Select the TCP/IP tab,Then click the "Configure IPv4" drop-down menu in the lower left corner,Select "Turn off IPv4"。 Click "OK" to save settings,Your Mac will disconnect from the network。 Method two:Use shortcut keys to quickly disconnect from Wi-Fi if you just want to disconnect from Wi-Fi,You can use shortcut keys for quick operations。Press Option + Click the Wi-Fi icon in the upper right corner of the screen,A menu will pop up,Select "Disconnect from Wi-Fi"。 Method three:Use third-party network management tools in addition to the network settings that come with the Mac system,You can also choose to use third-party network management tools to manage network connections more flexibly。These tools usually offer more features and options,Can meet your more complex network needs。You can search for network management tools suitable for your Mac computer in the App Store or online。 Through the above methods,I believe you have mastered how to easily disconnect your Mac computer from the network。Whether you need to disconnect from Wi-Fi or other networks,You can choose the appropriate method according to your own needs。Remember to reconnect to the Internet when needed!
The startup screen may vary depending on your Mac model、Varies depending on factors such as operating system (macOS)。Some screens, such as the ban sign or question mark, mean you need to solve a problem first,Then the Mac can complete booting。For all Mac models,When you see the Finder menu bar、Desktop and Dock,This means that the startup is complete。today,The editor of MacW will take you to understand what the various interfaces displayed when Mac starts up represent.。 1. Forbidden symbol A circle crossed by a line or slash means that the selected startup disk contains a Mac operating system,But it's not macOS for your Mac。You should reinstall macOS on this disk。 2. Question mark A folder with a question mark means that the selected startup disk is not available,or does not include Mac OS。Learn how to fix problems with flashing question marks。 3. Blank Screen It is normal to have one or more blank screens during startup.。it may be black、grey、blue,It could also be a desktop picture。If no image appears on the screen after a while,Make sure your display is on、Connected and brightness turned up。 4. Apple Logo Your Mac displays the Apple logo after finding the local startup disk,This disk is the Mac's built-in startup disk or is directly connected to the Mac's startup disk。If your Mac cannot find your local startup disk,then it will try to use a network boot disk if one is available。As the boot process continues,You should see a progress bar or indicator showing the circle (which may or may not contain the Apple logo)。This screen may alternate with a blank screen multiple times。 If you're updating or reinstalling macOS,then this stage may take longer to complete。As the installation continues,The progress bar may move slowly and pause for a long time。Find out if your Mac seems to be stuck on this screen during the installation process or just after the installation is complete,what to do。 5. Rotating Earth When using a network boot disk,Your Mac displays a spinning globe instead of the Apple logo。When launching from macOS recovery function over the Internet,There will also be a rotating earth。As the boot process continues,You should see a progress bar,It may alternate with a blank screen multiple times。 6. Earth with warning symbol when your Mac tries to boot from macOS Recovery over the Internet and fails,You may see a globe with an exclamation mark。Your Mac may not be able to connect to the internet,Or it might be using a network configuration that's incompatible with macOS recovery features。Please try the following solutions: – Use Command-R on startup to try to use the built-in macOS recovery system,Rather than booting from macOS recovery over the Internet。 – Connect to the Internet using Ethernet instead of Wi-Fi,vice versa。 – Connect to the Internet from another network。 – Please try again later,Because the problem may be temporary。 7. Lock icon If your Mac uses a firmware password,then when you try to download a file from another disk or volume such as,external drive or macOS recovery) a lock icon appears when starting。Please enter your firmware password to continue。 8. PIN code to lock your system if your Mac is locked remotely via the Find My feature,then your Mac will ask for a PIN。Please enter a four-digit or six-digit password to continue。 9. Login window In the login window,Enter your user account password,to log into your Mac。If FileVault is open,then this action will also unlock your disk。You may see the default desktop picture in the background,After you select your account,This image may be changed to a desktop image of your choice。 By understanding these launch screens,You can better solve problems you encounter when your Mac starts up,Make sure your Mac starts up smoothly and works normally。
Logic Pro for Mac is a powerful, full-featured music app,Comes with all the tools you need to create professional-quality music。you can record、Arrange and edit audio and MIDI regions,Add high-quality effects,Mix music into stereo or surround sound,The final mix is then exported to various formats for distribution。 You can create many different types of projects using Logic Pro,Suitable for everything from simple music to complex ensemble arrangements。Logic Pro for Mac gives you the flexibility to customize the app to fit the way you work。 Functions that Logic Pro can implement include: Record vocals、Instruments or any sound that can be captured by a microphone,Includes recorded footage and composition。 Use a USB keyboard or other MIDI controller,Play and record software instruments included with Logic Pro for Mac。You can also play and record third-party audio unit software instruments。 Add virtual drummer to project,to create detailed、Realistic virtual drum performance,and according to genre、Dynamically adjust project content and other parameters。 Add Apple Loops and other media files to your project。 Arrange regions containing musical material in the Tracks area。You can also define parts of your project and use arrangement markers to quickly rearrange them。 Use a set of editors optimized for different tasks and clip types,Edit audio and MIDI regions。 Edit audio clip、single note、Timing and pitch of chords and sounds。 Mix your project in the mixer,where you can view and edit channel strip controls,Custom sending options,and add and edit plugins。 Using Holistic Recovery Mix Automation,make mix、Effect and plug-in settings change automatically over time。You can record automation changes in real time,and edit them later。 Controls include speed、Transposition and global settings including time signature and key signature to adjust the entire project。Use markers to define and quickly move to different parts of your project。 View MIDI regions in your project as scores,Add and edit notes and other musical symbols,and print the finished score as well as individual parts。
MacBook Pro’s Touch Bar is a very handy tool,It can display different shortcut functions according to your needs。but,The default settings may not meet all your needs,You can optimize Touch Bar functionality with custom settings。Here are the steps on how to customize the Touch Bar function bar: 1. Open System Preferences • Click the Apple icon in the upper left corner of the screen,Select "System Preferences"。 2. Go to Keyboard Settings •In System Preferences,Click on the "Keyboard" option。 3. Access Touch Bar settings • In the Keyboard settings window,Click the "Customize Touch Bar" button。 4. Customize Touch Bar functionality •Drag and drop icons:In the custom interface that appears,You can drag different function icons into the virtual area of the Touch Bar。You can select "Frequently Used Functions"、"Control Bar"、"Application shortcut keys" etc.。 •Add or remove features:Click on the function options on the left,Drag them into the Touch Bar to add them。To remove functionality,Just drag it off the Touch Bar。 •Adjust the order:Drag function icons to adjust the order in which they appear in the Touch Bar。 5.Complete setup •After customization is complete,Click the "Done" button in the lower right corner of the window to save the settings。 6. Application-specific settings •You can also set Touch Bar functionality for specific applications。In the "Customize Touch Bar" interface,You can select "Application Shortcuts",Then customize your own Touch Bar button for each app。 Go through the above steps,You can optimize your Mac’s Touch Bar functionality based on your personal needs,Improve operational efficiency。
To view system operating information and memory usage on your Mac,You can open Activity Monitor in two ways:: Method one: 1. Open Activity Monitor via Launchpad • Click on the Launchpad icon at the bottom of the screen。 •Find the "Other" folder in Launchpad and click to open。 •Find “Activity Monitor” in the “Other” folder and click to open。 Method two: 1. Open Activity Monitor via Finder • Click the Finder icon at the bottom of the screen。 •In the toolbar on the left side of the Finder window,Click "Apps"。 •Find and double-click the "Utilities" folder on the right。 • Find “Activity Monitor” in the “Utilities” folder and double-click to open it。 Through the above two methods,You can easily open Activity Monitor,Check your Mac’s system running information and memory usage。
In macOS 10.15 (Catalina) and below,The system restricts the installation of non-App Store downloaded applications by default to improve security.。If you need to install third-party software from non-App Store,You can follow the steps below: How to install non-App Store software Note:The following steps only work on macOS 10.15 and below 1. Open "System Preferences" and click the Apple icon in the upper left corner of the screen,Then select "System Preferences"。 2. Go to Security & Privacy settings in the System Preferences window,Click "Security & Privacy"。 3.Unlock Settings In the lower left corner of the Security & Privacy window,Click the lock icon to unlock settings。You will be prompted to enter your administrator password。After entering the password,Click "Unlock"。 4. Allow apps from any source In the "Allow apps downloaded from" section,You will see three options:App Store、App Store and identified developers。Select "Any Source"。(Notice:In macOS 10.15 and above,There may not be this option。If this option is not available,Other solutions you can try,To bypass this restriction, use right-click on a file。) 5. Re-lock settings Click the lock icon in the lower left corner,to lock settings and protect your security settings。 6.Install software now,You can double-click and run apps downloaded from other sources。If you encounter the "Cannot open the application" prompt,Please right click on the application icon,Select "Open",Then click "Open" to confirm you trust the app。 go through these steps,You can install software from non-App Store in macOS 10.15 and below。
EndNote 21 is hailed as the world's best reference manager,It is designed to help users save time、Stay organized and collaborate with colleagues,ultimately achieve the goal of publishing research results。 This means you can focus more on what matters most:your ideas。 EndNote 21 makes organizing、Managing and citing diverse academic literature becomes a breeze,Whether it's a book、Journal articles or online resources。 Its powerful search function allows you to quickly find the information you need among millions of research resources,And can be seamlessly integrated with a variety of word processing software,Simplifies the process of citing and generating bibliographies when writing a paper or report,Greatly improve writing efficiency。 EndNote 21 is not just for researchers、engineer、Strong support from inventors and cataloging experts,Tag management is also introduced、Data recovery and other new features,and improved writing processes with Google Docs tools。 New EndNote web interface and support for Google Docs,Enables users to access research materials anytime, anywhere,Improved ease of research and collaboration。
System Toolkit is an all-in-one information and maintenance application designed for MacOS。 System Toolkit provides system maintenance、Privacy protection、disk cleanup、Battery maintenance、Network status monitoring、Practical functions such as network traffic monitoring。 System Toolkit can retrieve the latest technical data at any time,For example, process load,CPU temperature,Main memory consumption,storage space,disk activity,Communication on network interfaces, etc.。The program continuously monitors your system,and be available when needed。
Many people using Mac use Parallels Desktop 19 Windows system installed,But when I need to delete the Windows system, I don’t know how to do it.。Next,The editor of macwk brings you how to delete Parallels Desktop 19 Installation tutorial for Windows systems,Hope this helps! Remove Parallels Desktop 19 Installation steps for Windows systems 1. Open Parallels Desktop 19 •Start Parallels Desktop 19,Click the Parallels Desktop icon in the upper right corner,Select "Control Center"。 2. Select the Windows system to be deleted •In the Control Center interface,Find "Windows...
Comments (0)